Account Linking With NBA Top Shot
Account Linking is a powerful Flow feature that allows users to connect their wallets, enabling linked wallets to view and manage assets in one wallet with another. This feature helps reduce or even eliminate the challenges posed by other account abstraction solutions, which often lead to multiple isolated wallets and fragmented assets.
In this tutorial, you'll build a simple onchain app that allows users to sign into your app with their Flow wallet and view NBA Top Shot Moments that reside in their Dapper Wallet - without those users needing to sign in with Dapper.
Objectives
After completing this guide, you'll be able to:
- Pull your users' NBA Top Shot Moments into your Flow app without needing to transfer them out of their Dapper wallet
- Retrieve and list all NFT collections in any child wallet linked to a given Flow address
- Write a Cadence script to iterate through the storage of a Flow wallet to find NFT collections
- Run Cadence Scripts from the frontend
Prerequisites
Next.js and Modern Frontend Development
This tutorial uses Next.js. You don't need to be an expert, but it's helpful to be comfortable with development using a current React framework. You'll be on your own to select and use a package manager, manage Node versions, and other frontend environment tasks. If you don't have your own preference, you can just follow along with us and use Yarn.
Flow Wallet
You'll need a Flow Wallet, but you don't need to deposit any funds.
Moments NFTs
You'll need a Dapper Wallet containing some Moments NFTs, such as NBA Top Shot Moments.
Getting Started
This tutorial will use a Next.js project as the foundation of the frontend. Create a new project with:
_10npx create-next-app@latest
We will be using TypeScript and the App Router, in this tutorial.
Open your new project in the editor of your choice, install dependencies, and run the project.
_10yarn install_10yarn run dev
If everything is working properly, you'll be able to navigate to localhost:3000 and see the default Next.js page.
Flow Cadence Setup
You'll need a few more dependencies to efficiently work with Cadence inside of your app.
Flow CLI and Types
The Flow CLI contains a number of command-line tools for interacting with the Flow ecosystem. If you don't already have it installed, you can add it with Brew (or using other installation methods):
_10brew install flow-cli
Once it's installed, you'll need to initialize Flow in your Next.js project. From the root, run:
_10flow init --config-only
The --config-only flag initializes a project with the just the config file. This allows the Flow CLI to interact with your project without adding adding the other files you want for most projects.
Next, you'll need to do a little bit of config work so that your project knows how to read Cadence files. Install the Flow Cadence Plugin:
_10yarn add flow-cadence-plugin --dev
Finally, open next.config.ts and update it to use the plugin with Raw Loader:
_13// next.config.ts_13import type { NextConfig } from 'next';_13import FlowCadencePlugin from 'flow-cadence-plugin';_13_13const nextConfig: NextConfig = {_13 webpack: (config) => {_13 config.plugins.push(new FlowCadencePlugin());_13_13 return config;_13 },_13};_13_13export default nextConfig;
Frontend Setup
We'll use the Flow Client Library FCL to manage blockchain interaction from the frontend. It's similar to viem, ethers, or web3.js, but works with the Flow blockchain and transactions and scripts written in Cadence.
_10yarn add @onflow/fcl
Go ahead and install dotenv as well:
_10yarn add dotenv
Provider Setup
A fair amount of boilerplate code is needed to set up your provider. We'll provide it, but since it's not the purpose of this tutorial, we'll be brief on explanations. For more details, check out the App Quickstart Guide.
Add app/providers/AuthProvider.tsx:
_47'use client';_47/* eslint-disable @typescript-eslint/no-explicit-any */_47_47import { createContext, useContext, ReactNode } from 'react';_47import useCurrentUser from '../hooks/use-current-user.hook';_47_47interface State {_47 user: any;_47 loggedIn: any;_47 logIn: any;_47 logOut: any;_47}_47_47const AuthContext = createContext<State | undefined>(undefined);_47_47interface AuthProviderProps {_47 children: ReactNode;_47}_47_47const AuthProvider: React.FC<AuthProviderProps> = ({ children }) => {_47 const [user, loggedIn, logIn, logOut] = useCurrentUser();_47_47 return (_47 <AuthContext.Provider_47 value={{_47 user,_47 loggedIn,_47 logIn,_47 logOut,_47 }}_47 >_47 {children}_47 </AuthContext.Provider>_47 );_47};_47_47export default AuthProvider;_47_47export const useAuth = (): State => {_47 const context = useContext(AuthContext);_47_47 if (context === undefined) {_47 throw new Error('useAuth must be used within a AuthProvider');_47 }_47_47 return context;_47};
Then, add app/hooks/use-current-user-hook.tsx:
_20import { useEffect, useState } from 'react';_20import * as fcl from '@onflow/fcl';_20_20export default function useCurrentUser() {_20 const [user, setUser] = useState({ addr: null });_20_20 const logIn = () => {_20 fcl.authenticate();_20 };_20_20 const logOut = () => {_20 fcl.unauthenticate();_20 };_20_20 useEffect(() => {_20 fcl.currentUser().subscribe(setUser);_20 }, []);_20_20 return { user, loggedIn: user?.addr != null, logIn, logOut };_20}
.env
Add a .env to the root and fill it with:
_10NEXT_PUBLIC_ACCESS_NODE_API="https://rest-mainnet.onflow.org"_10NEXT_PUBLIC_FLOW_NETWORK="mainnet"_10NEXT_PUBLIC_WALLETCONNECT_ID=<YOUR ID HERE>
Don't forget to replace <YOUR ID HERE> with your own Wallet Connect app id!
Implement the Provider and Flow Config
Finally, open layout.tsx. Start by importing Flow dependencies and the AuthProvider:
_10import flowJSON from '../flow.json';_10import * as fcl from '@onflow/fcl';_10_10import AuthProvider from './providers/AuthProvider';
Then add your Flow config:
_10fcl_10 .config({_10 'discovery.wallet': 'https://fcl-discovery.onflow.org/authn',_10 'accessNode.api': process.env.NEXT_PUBLIC_ACCESS_NODE_API,_10 'flow.network': process.env.NEXT_PUBLIC_FLOW_NETWORK,_10 'walletconnect.projectId': process.env.NEXT_PUBLIC_WALLETCONNECT_ID,_10 })_10 .load({ flowJSON });
We're going to force some things client side to get this proof-of-concept working quickly. Use Next.js best practices for a production app.
Add a 'use client'; directive to the top of the file and delete the import for Metadata and fonts, as well as the code related to them.
Finally, update the <body> to remove the font references and suppress hydration warnings:
_10<body suppressHydrationWarning={true}>
Your code should be:
_30// layout.tsx_30'use client';_30import './globals.css';_30import flowJSON from '../flow.json';_30import * as fcl from '@onflow/fcl';_30_30import AuthProvider from './providers/AuthProvider';_30_30fcl_30 .config({_30 'discovery.wallet': 'https://fcl-discovery.onflow.org/authn',_30 'accessNode.api': process.env.NEXT_PUBLIC_ACCESS_NODE_API,_30 'flow.network': process.env.NEXT_PUBLIC_FLOW_NETWORK,_30 'walletconnect.projectId': process.env.NEXT_PUBLIC_WALLETCONNECT_ID,_30 })_30 .load({ flowJSON });_30_30export default function RootLayout({_30 children,_30}: {_30 children: React.ReactNode;_30}) {_30 return (_30 <html lang="en">_30 <body suppressHydrationWarning={true}>_30 <AuthProvider>{children}</AuthProvider>_30 </body>_30 </html>_30 );_30}
Add the Connect Button
Open page.tsx and clean up the demo code leaving only the <main> block:
_11import Image from 'next/image';_11_11export default function Home() {_11 return (_11 <div className="grid grid-rows-[20px_1fr_20px] items-center justify-items-center min-h-screen p-8 pb-20 gap-16 sm:p-20 font-[family-name:var(--font-geist-sans)]">_11 <main className="flex flex-col gap-8 row-start-2 items-center sm:items-start">_11 <div>TODO</div>_11 </main>_11 </div>_11 );_11}
Add a 'use client'; directive, import the useAuth hook and instantiate it in the Home function:
_10'use client';_10import { useAuth } from './providers/AuthProvider';
_10const { user, loggedIn, logIn, logOut } = useAuth();
Then add a button in the <main> to handle logging in or out:
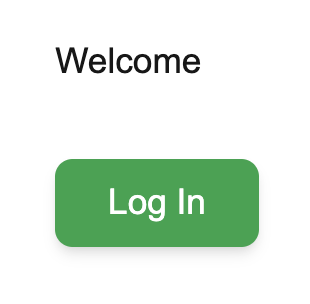
_10<main className="flex flex-col gap-8 row-start-2 items-center sm:items-start">_10 <div>Welcome</div>_10 <button_10 onClick={loggedIn ? logOut : logIn}_10 className="px-6 py-2 text-white bg-green-600 hover:bg-green-700 rounded-lg shadow-md transition duration-200 ease-in-out focus:outline-none focus:ring-2 focus:ring-green-500 sm:ml-auto"_10 >_10 {loggedIn ? 'Log Out' : 'Log In'}_10 </button>_10</main>
Testing Pass
Run the app:
_10yarn dev
You'll see your Log In button in the middle of the window.
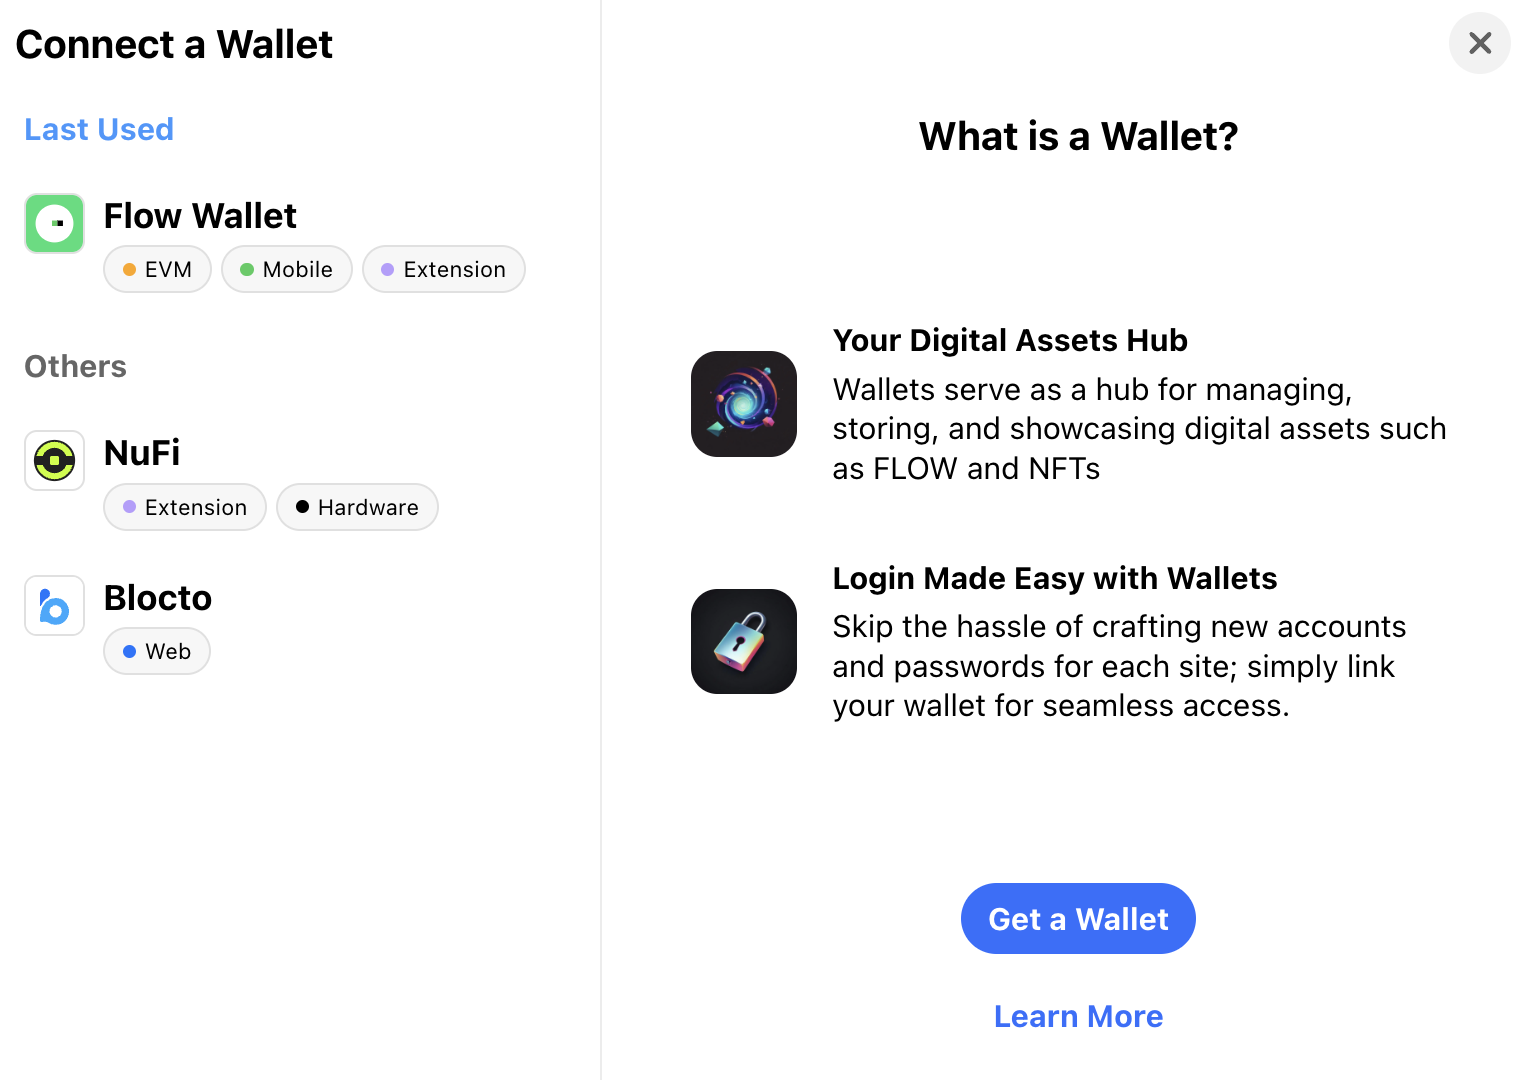
Click the button and log in with your Flow wallet.
Account Linking
Now that your app is set up, you can make use of Account Linking to to pull your NFTs from your Dapper Wallet, through your Flow Wallet, and into the app.
Setting Up Account Linking
If you haven't yet, you'll need to link your Dapper Wallet to your Flow Wallet.
The Dapper Wallet requires that you complete KYC before you can use Account Linking. While this may frustrate some members of the community, it makes it much easier for app developers to design onboarding rewards and bonuses that are less farmable.
Discovering the NFTs with a Script
With your accounts linked, your Flow Wallet now has a set of capabilities related to your Dapper Wallet and it's permitted to use those to view and even manipulate those NFTs and assets.
Before you can add a script that can handle this, you'll need to import the HybridCustody contract using the Flow Dependency Manager:
_10flow dependencies install mainnet://d8a7e05a7ac670c0.HybridCustody
Choose none to skip deploying on the emulator and skip adding testnet aliases. There's no point, these NFTs are on mainnet!
You'll get a complete summary from the Dependency Manager:
_31📝 Dependency Manager Actions Summary_31_31🗃️ File System Actions:_31✅️ Contract HybridCustody from d8a7e05a7ac670c0 on mainnet installed_31✅️ Contract MetadataViews from 1d7e57aa55817448 on mainnet installed_31✅️ Contract FungibleToken from f233dcee88fe0abe on mainnet installed_31✅️ Contract ViewResolver from 1d7e57aa55817448 on mainnet installed_31✅️ Contract Burner from f233dcee88fe0abe on mainnet installed_31✅️ Contract NonFungibleToken from 1d7e57aa55817448 on mainnet installed_31✅️ Contract CapabilityFactory from d8a7e05a7ac670c0 on mainnet installed_31✅️ Contract CapabilityDelegator from d8a7e05a7ac670c0 on mainnet installed_31✅️ Contract CapabilityFilter from d8a7e05a7ac670c0 on mainnet installed_31_31💾 State Updates:_31✅ HybridCustody added to emulator deployments_31✅ Alias added for HybridCustody on mainnet_31✅ HybridCustody added to flow.json_31✅ MetadataViews added to flow.json_31✅ FungibleToken added to flow.json_31✅ ViewResolver added to flow.json_31✅ Burner added to flow.json_31✅ NonFungibleToken added to flow.json_31✅ CapabilityFactory added to emulator deployments_31✅ Alias added for CapabilityFactory on mainnet_31✅ CapabilityFactory added to flow.json_31✅ CapabilityDelegator added to emulator deployments_31✅ Alias added for CapabilityDelegator on mainnet_31✅ CapabilityDelegator added to flow.json_31✅ CapabilityFilter added to emulator deployments_31✅ Alias added for CapabilityFilter on mainnet_31✅ CapabilityFilter added to flow.json
Add app/cadence/scripts/FetchNFTsFromLinkedAccts.cdc. In it, add this script. Review the inline comments to see what each step is doing:
_88import "HybridCustody"_88import "NonFungibleToken"_88import "MetadataViews"_88_88// This script iterates through a parent's child accounts,_88// identifies private paths with an accessible NonFungibleToken.Provider, and returns the corresponding typeIds_88_88access(all) fun main(addr: Address): AnyStruct {_88 let manager = getAuthAccount<auth(Storage) &Account>(addr).storage.borrow<auth(HybridCustody.Manage) &HybridCustody.Manager>(from: HybridCustody.ManagerStoragePath)_88 ?? panic ("manager does not exist")_88_88 var typeIdsWithProvider: {Address: [String]} = {}_88 var nftViews: {Address: {UInt64: MetadataViews.Display}} = {}_88_88 let providerType = Type<auth(NonFungibleToken.Withdraw) &{NonFungibleToken.Provider}>()_88 let collectionType: Type = Type<@{NonFungibleToken.CollectionPublic}>()_88_88 for address in manager.getChildAddresses() {_88 let acct = getAuthAccount<auth(Storage, Capabilities) &Account>(address)_88 let foundTypes: [String] = []_88 let views: {UInt64: MetadataViews.Display} = {}_88 let childAcct = manager.borrowAccount(addr: address) ?? panic("child account not found")_88_88 // Iterate through storage paths to find NFTs that are controlled by the parent account_88 // To just find NFTs, check if thing stored is nft collection and borrow it as NFT collection and get IDs_88 for s in acct.storage.storagePaths {_88 // Iterate through capabilities_88 for c in acct.capabilities.storage.getControllers(forPath: s) {_88 if !c.borrowType.isSubtype(of: providerType){_88 // If this doen't have providerType, it's not an NFT collection_88 continue_88 }_88_88 // We're dealing with a Collection but we need to check if accessible from the parent account_88 if let cap: Capability = childAcct.getCapability(controllerID: c.capabilityID, type: providerType) { // Part 1_88 let providerCap = cap as! Capability<&{NonFungibleToken.Provider}>_88_88 if !providerCap.check(){_88 // If I don't have access to control the account, skip it._88 // Disable this check to do something else._88 //_88 continue_88 }_88_88 foundTypes.append(cap.borrow<&AnyResource>()!.getType().identifier)_88 typeIdsWithProvider[address] = foundTypes_88 // Don't need to keep looking at capabilities, we can control NFT from parent account_88 break_88 }_88 }_88 }_88_88 // Iterate storage, check if typeIdsWithProvider contains the typeId, if so, add to views_88 acct.storage.forEachStored(fun (path: StoragePath, type: Type): Bool {_88_88 if typeIdsWithProvider[address] == nil {_88 return true_88 }_88_88 for key in typeIdsWithProvider.keys {_88 for idx, value in typeIdsWithProvider[key]! {_88 let value = typeIdsWithProvider[key]!_88_88 if value[idx] != type.identifier {_88 continue_88 } else {_88 if type.isInstance(collectionType) {_88 continue_88 }_88 if let collection = acct.storage.borrow<&{NonFungibleToken.CollectionPublic}>(from: path) {_88 // Iterate over IDs & resolve the Display view_88 for id in collection.getIDs() {_88 let nft = collection.borrowNFT(id)!_88 if let display = nft.resolveView(Type<MetadataViews.Display>())! as? MetadataViews.Display {_88 views.insert(key: id, display)_88 }_88 }_88 }_88 continue_88 }_88 }_88 }_88 return true_88 })_88 nftViews[address] = views_88 }_88 return nftViews_88}
The above script is a relatively naive implementation. For production, you'll want to filter for only the collections you care about, and you will eventually need to add handling for very large collections in a wallet.
Running the Script and Displaying the NFTs
Add a component in app/components called DisplayLinkedNFTs.cdc.
In it, import dependencies from React and FCL, as well as the script you just added:
_10import React, { useState, useEffect } from 'react';_10import * as fcl from '@onflow/fcl';_10import * as t from '@onflow/types';_10_10import FetchNFTs from '../cadence/scripts/FetchNFTsFromLinkedAccts.cdc';
As we're using TypeScript, you should add some types as well to manage the data from the NFTs nicely. For now, just add them to this file:
_21type Thumbnail = {_21 url: string;_21};_21_21type Moment = {_21 name: string;_21 description: string;_21 thumbnail: Thumbnail;_21};_21_21type MomentsData = {_21 [momentId: string]: Moment;_21};_21_21type ApiResponse = {_21 [address: string]: MomentsData;_21};_21_21interface AddressDisplayProps {_21 address: string;_21}
Then, add the function for the component:
_10const DisplayLinkedNFTs: React.FC<AddressDisplayProps> = ({ address }) => {_10 // TODO..._10_10 return <div>Nothing here yet</div>;_10};_10_10export default DisplayLinkedNFTs;
In the function, add a state variable to store the data retrieved by the script:
_10const [responseData, setResponseData] = useState<ApiResponse | null>(null);
Then, use useEffect to fetch the NFTs with the script and fcl.query:
_23useEffect(() => {_23 const fetchLinkedAddresses = async () => {_23 if (!address) return;_23_23 try {_23 const cadenceScript = FetchNFTs;_23_23 // Fetch the linked addresses_23 const response: ApiResponse = await fcl.query({_23 cadence: cadenceScript,_23 args: () => [fcl.arg(address, t.Address)],_23 });_23_23 console.log(JSON.stringify(response, null, 2));_23_23 setResponseData(response);_23 } catch (error) {_23 console.error('Error fetching linked addresses:', error);_23 }_23 };_23_23 fetchLinkedAddresses();_23}, [address]);
Return to page.tsx, import your new component, and add an instance of <DisplayLinkedNFTs> that passes in the user's address and is only displayed while loggedIn.
_10{_10 loggedIn && <DisplayLinkedNFTs address={user.addr} />;_10}
Testing
Run the app again. If you have linked your account and have NFTs in that account, you'll see them in the console!
Displaying the Moments
Now that they're here, all to do is display them nicely! Return to DisplayLinkedNFTs.tsx. Add a helper function to confirm each returned NFT matches the Moments format. You can update this to handle other NFTs you'd like to show as well.
Remember, you'll also need to update the script in a production app to filter for only the collections you want, and handle large collections.
_15// Type-checking function to validate moment structure_15// eslint-disable-next-line @typescript-eslint/no-explicit-any_15const isValidMoment = (moment: any): moment is Moment => {_15 const isValid =_15 typeof moment.name === 'string' &&_15 typeof moment.description === 'string' &&_15 moment.thumbnail &&_15 typeof moment.thumbnail.url === 'string';_15_15 if (!isValid) {_15 console.warn('Invalid moment data:', moment);_15 }_15_15 return isValid;_15};
Next, add a rendering function with some basic styling:
_33// Function to render moments with validation_33const renderMoments = (data: ApiResponse) => {_33 return Object.entries(data).map(([addr, moments]) => (_33 <div_33 key={addr}_33 className="border border-gray-300 rounded-lg shadow-sm p-4 mb-6 bg-white"_33 >_33 <h4 className="text-lg font-semibold mb-4 text-gray-800">_33 Linked Wallet: {addr}_33 </h4>_33 <div className="grid grid-cols-1 gap-4 md:grid-cols-2 lg:grid-cols-3">_33 {Object.entries(moments).map(([momentId, moment]) =>_33 isValidMoment(moment) ? (_33 <div_33 key={momentId}_33 className="border border-gray-200 rounded-lg p-4 shadow hover:shadow-lg transition-shadow duration-200 bg-gray-50"_33 >_33 <h5 className="text-md font-bold text-blue-600 mb-2">_33 {moment.name}_33 </h5>_33 <p className="text-sm text-gray-600 mb-4">{moment.description}</p>_33 <img_33 src={moment.thumbnail.url}_33 alt={moment.name}_33 className="w-full h-32 object-cover rounded"_33 />_33 </div>_33 ) : null,_33 )}_33 </div>_33 </div>_33 ));_33};
Finally, update the return with some more styling and the rendered NFT data:
_18return (_18 <div className="p-6 bg-gray-100 min-h-screen">_18 {address ? (_18 <div className="max-w-4xl mx-auto">_18 <h3 className="text-2xl font-bold text-gray-800 mb-4">Moments Data:</h3>_18 <div>_18 {responseData ? (_18 renderMoments(responseData)_18 ) : (_18 <p className="text-gray-500">No Moments Data Available</p>_18 )}_18 </div>_18 </div>_18 ) : (_18 <div className="text-center text-gray-500 mt-8">No Address Provided</div>_18 )}_18 </div>_18);
Further Polish
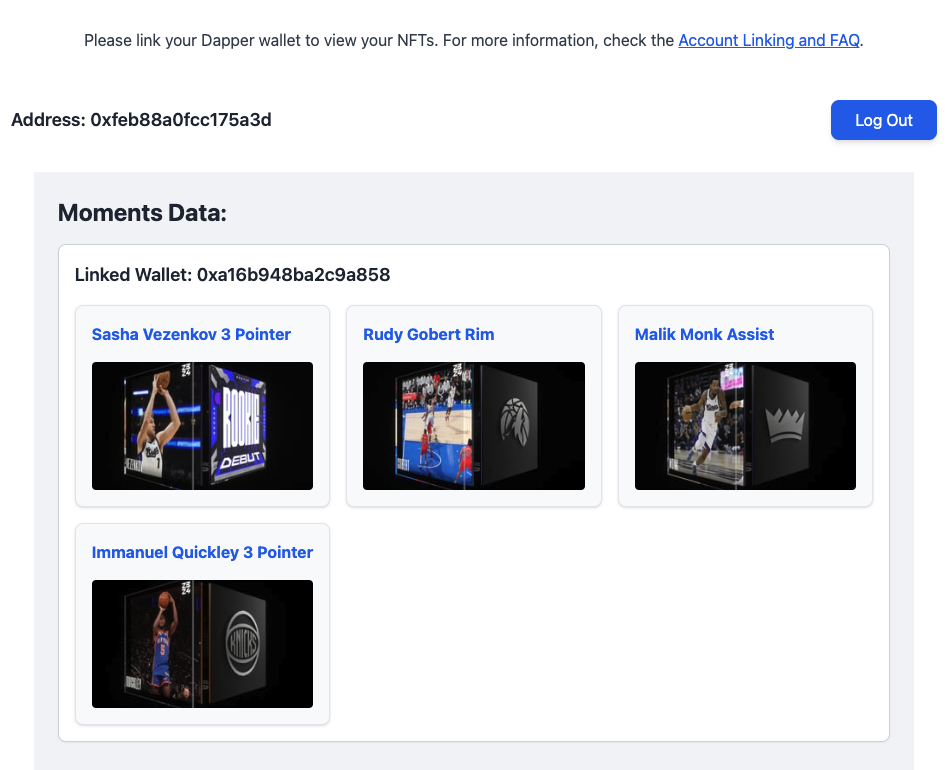
Finally, you can polish up your page.tsx to look a little nicer, and guide your users to the Account Linking process in the Dapper Wallet:
_52'use client';_52import DisplayLinkedNFTs from './components/DisplayLinkedNFTs';_52import { useAuth } from './providers/AuthProvider';_52_52export default function Home() {_52 const { user, loggedIn, logIn, logOut } = useAuth();_52_52 return (_52 <div className="grid grid-rows-[auto_1fr_auto] items-center justify-items-center min-h-screen p-8 sm:p-20 bg-gray-100 font-sans">_52 <main className="flex flex-col gap-8 row-start-2 items-center w-full max-w-5xl px-12 py-12 bg-white rounded-lg shadow-lg border border-gray-200">_52 {/* Message visible for all users */}_52 <p className="text-center text-gray-700 mb-4">_52 Please link your Dapper wallet to view your NFTs. For more_52 information, check the{' '}_52 <a_52 href="https://support.meetdapper.com/hc/en-us/articles/20744347884819-Account-Linking-and-FAQ"_52 target="_blank"_52 rel="noopener noreferrer"_52 className="text-blue-600 hover:text-blue-800 underline"_52 >_52 Account Linking and FAQ_52 </a>_52 ._52 </p>_52_52 <div className="flex flex-col sm:flex-row sm:items-center sm:justify-between w-full gap-6">_52 {/* Display user address or linked NFTs if logged in */}_52 {loggedIn ? (_52 <div className="text-lg font-semibold text-gray-800">_52 Address: {user.addr}_52 </div>_52 ) : (_52 <div className="text-lg font-semibold text-gray-800">_52 Please log in to view your linked NFTs._52 </div>_52 )}_52_52 {/* Login/Logout Button */}_52 <button_52 onClick={loggedIn ? logOut : logIn}_52 className="px-6 py-2 text-white bg-blue-600 hover:bg-blue-700 rounded-lg shadow-md transition duration-200 ease-in-out focus:outline-none focus:ring-2 focus:ring-blue-500 sm:ml-auto"_52 >_52 {loggedIn ? 'Log Out' : 'Log In'}_52 </button>_52 </div>_52_52 {/* Display NFTs if logged in */}_52 {loggedIn && <DisplayLinkedNFTs address={user.addr} />}_52 </main>_52 </div>_52 );_52}
Your app will now look like the simple onchain app demo!
Conclusion
In this tutorial, you took your first steps towards building powerful new experiences that meet you customers where they are. They can keep their assets in the wallet associate with one app, but also give your app the ability to use them - seamlessly, safely, and beautifully!
Reference Solution
You are not saving time by skipping the the reference implementation. You'll learn much faster by doing the tutorials as presented!
Reference solutions are functional, but may not be optimal.